Astrophotography Basics: Picking A Suitable Site

While doing astrophotography from your backyard can result in lovely pictures, I think doing it out in the wilds is a whole different beast.

In this post, I want to spend some time discussing how to pick out an appropriate site. It may be more accurate say that this post is how I end up picking an appropriate site to do astrophotography.

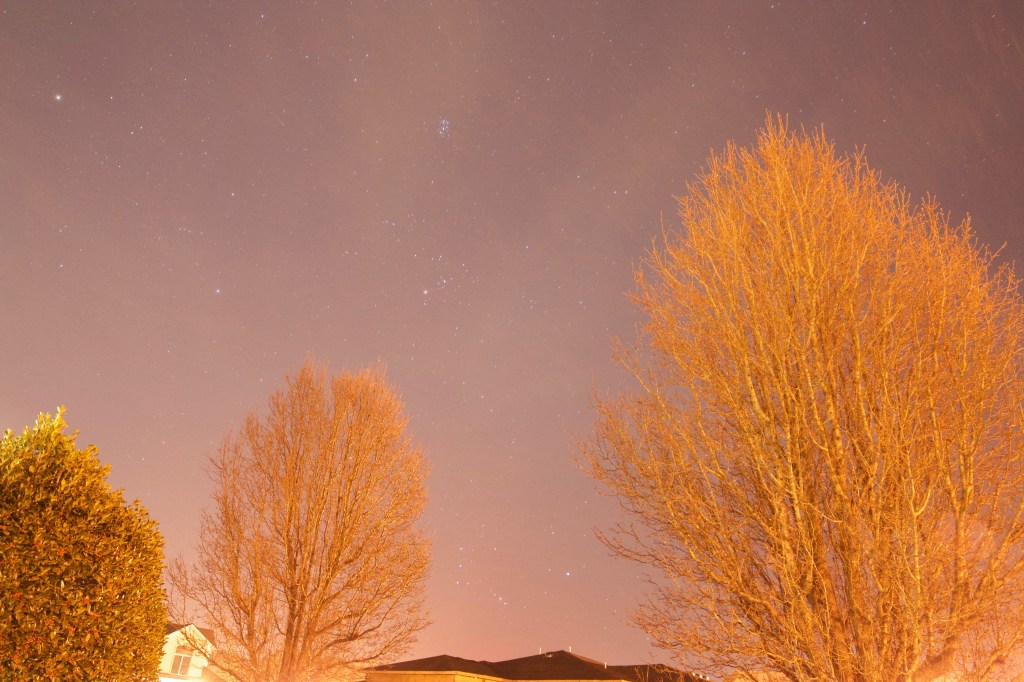
You absolutely can do astrophotography from your backyard. However, I think most of us will be dealing with a significant amount of light pollution if we limit it solely to our backyards. A lot of us, due to necessity, will live in metropolitan areas or suburban areas with significant light pollution. This isn’t to say it is impossible to photograph from your backyard or balcony in an urban area, but it is more difficult to capture celestial objects from the city skies.

Picture taken in a suburban neighborhood on the East Coast.

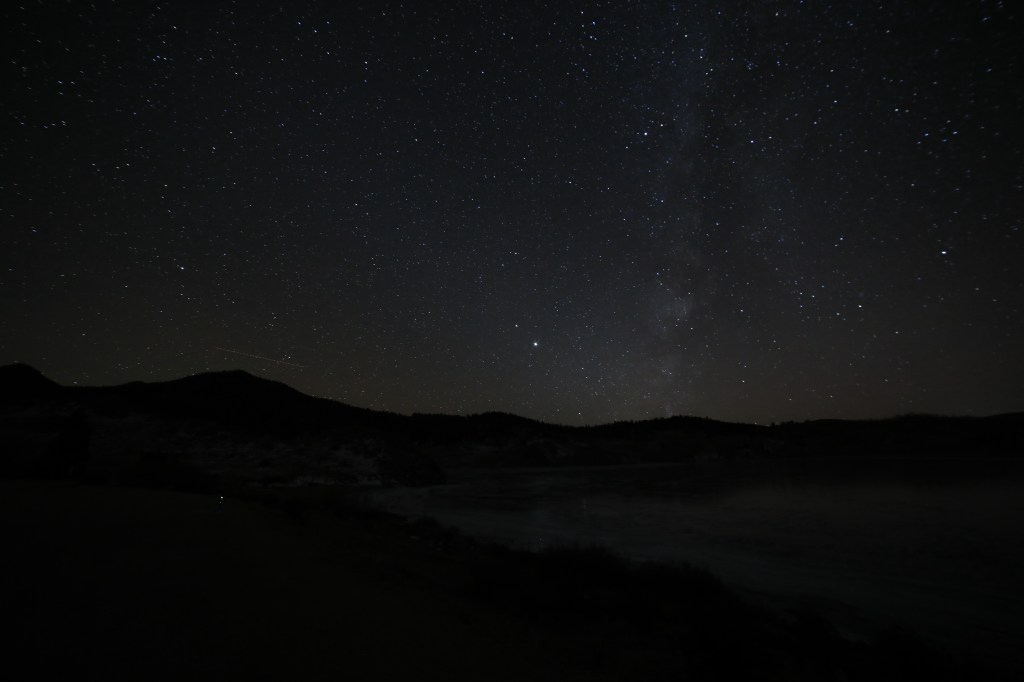
Given that, I generally head out to the countryside/more rural parts given there is less light pollution there. That raises the question of how do you pick out an appropriate site?

  1. Research dark sky parks/international dark sites/locations situated away from major metropolitan areas.

You really don’t need to reinvent the wheel here. There is already a plethora of information on the internet already regarding suitable dark sky parks/dark sky sites/designated dark sites.

A friend from work gifted me her AAA magazine which had a feature on best places to do stargazing!

Given the booming interest in astrophotography–how it unites people and also leads to people traveling to get to the best locations—you will actually find websites listing exceptional places to do your stargazing.

Darksky.org has a listing of places all over the United States and elsewhere where people can do astrophotography and stargazing.

Essentially, some folks have done a lot of the easy work for you already and it is a matter of finding the right dark sky site that is not too far from you or one you can make a part of your next trip.

2. If possible, try to visit your proposed astrophotography spot during the daytime.

Trust me on this.

It is frustrating to head to an astrophotography spot and not be sure you are in the right spot because it’s dark and you’re unfamiliar with the area. Not only does this possibly lead to wasted time, but it can also be unsafe as well.

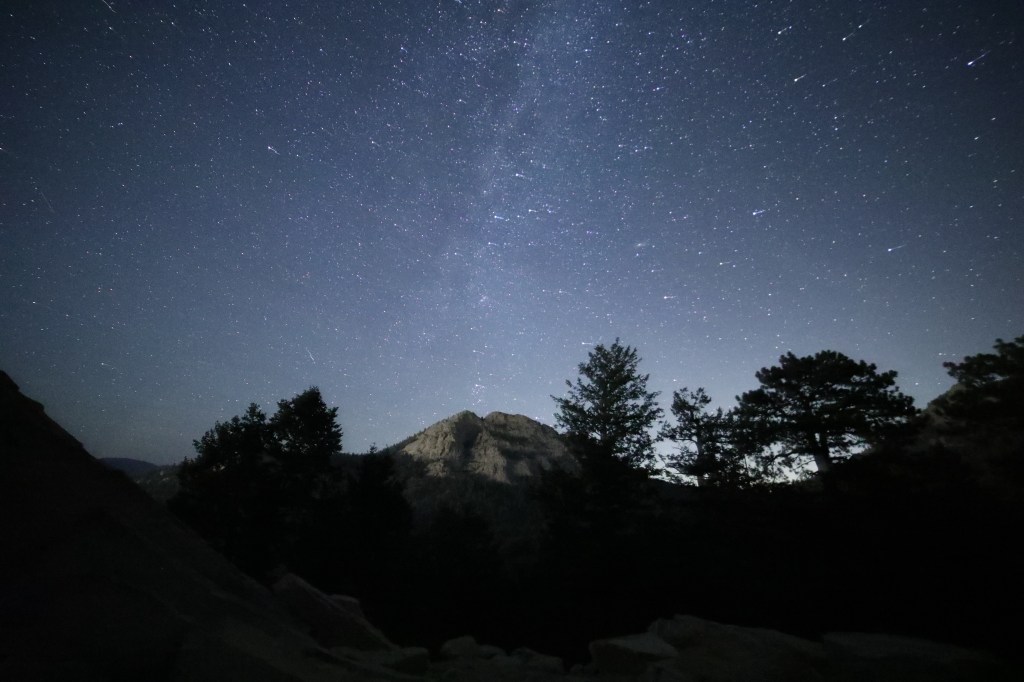
If possible, try to visit the spot you want to do astrophotography at during the daytime. During the daytime, you can get a lay of the terrain and get a sense of what would make an interesting foreground for a photo.

You can also use certain apps to see what the night sky will look like later in the evening (more on this in a future post!).

Safety is also related to this as well. The last thing you want is to be heading to a spot in the dark for the first time and you twist your ankle because you were not aware that the area had a ton of loose rocks. Those are the types of dangers/obstacles that you can avoid or head-off by visiting a proposed site during the day.

Normally, I like to do day hikes for potential astrophotography locations. If I think it is suitable, I will come back prepared in the evening with my gear feeling more confident that I have a general idea of how the area looks.

3. Know the rules and regulations of the astrophotography sites that you are visiting.

With hiking, you are responsible for knowing the rules, regulations, and customs when you head out into the outdoors. It is the same with astrophotography.

National parks, national preserves, national grasslands, and their state counterparts will generally have their rules and regulations posted within the park and also on their respective websites.

Common things to look out for:

I. Will I need to pay for a park pass or pay some type of fee? Will I need to pay a separate fee to park my vehicle?

II. What are the hours of operation for the place I am visiting? Being inside of a park outside of designated hours can lead to you being fined, cited, or ending up with a criminal case.

III. Are there seasonal closures I have to be aware of? Some picturesque places may have roads that shut down for portions of the year due to the weather, so be sure to check ahead.

IV. Be wary of trespassing into private property! Some national park lands and some state park lands can be and are situated right not to private land. The owners may be very strict about who they allow on their property.

V. Are reservations required for the spot I am trying to visits? Withe the COVID-19 pandemic, many outdoor areas ares instituting timed-entry/reservations in order for people to visit an area.

4. Google Street View can be your friend!

I started using this feature of Google Maps to try to get a sense of how a location might look if I visited it. Understanding that it is only as reliable as the people posting the information (I am pretty sure I saw Darth Vader posted on the summit of a mountain!), I have found it to be somewhat useful in giving me a sense of what to expect with particular site and whether the drive out there might be worth. It doesn’t replace going in person, but it can be helpful in that regard.

Happy Star Hunting!

Useful Astrophotography Accessories AKA You Should Probably Take this With You When You Do Astrophotography: Light Sources

I can say that I have done astrophotography for about 2 years now. In that time, there has been a great amount of trial-and-error. I came into this hobby knowing nothing. While I have gained some knowledge, I can readily admit that there is still a lot I do not know about.

So many things can go wrong or can cut an astrophotography session short. Sometimes, a night out results in great pictures. However, sometimes things just don’t work out and in those instances, I have gone home empty-handed.

It is through these experiences that I learned a couple things to try to make the most out of my astrophotography sessions and increase the likelihood that I leave with pictures I treasure.

Astrophotography Accessory: Light Source

As much as I love astrophotography, I am one of those people who is very much afraid of the dark. It might sound ridiculous, but it is true.

When I see a horror film, I am one of those individuals whose imagination starts to play tricks on them. I start to see scary figures in the dark and things that aren’t there lol.

When you do astrophotography, you are generally going to want to drive to places out in the country to avoid light pollution in order to get best pictures possible (i.e. capture as many celestial objects in your photos as possible).

That means going to rural places that are very dark at night.

Oftentimes, I find myself to be the only person at these locations where I go and take pictures. Sometimes, I will see fellow astrophotographers—but that has been more of an uncommon thing in my experience. However, when I do see one out, I always try to be friendly and say hello!

Nevertheless, given how dark it is, you are going to want to have a light source with you when do your astrophotography.

It might sound a little contradictory—you have driven away from civilization to get away from light pollution and now I am telling you to bring a light source with you. That is exactly what I am saying here.

Some people do different things regarding light sources: they might bring a key chain, a flash light, or a headlamp with them. I have seen people even use their cellphones as a light source! I don’t recommend that though….

I tend to go with headlamps. I like wearing them on my forehead and it allows my hands to be free so I can focus on my camera settings.

I think astrophotography pictures can be a little deceiving. Many people will take photos and have a lit up foreground–but that is not what it looks like when you are actually out there taking the picture. Those pictures with the lit up foreground are generally the result of some creative photoshopping, i.e. taking a picture of the foreground when it is lit up and blending it with a picture of the night sky or the photographer lighting up the foreground with a light source while the exposure is happening.

While that makes for a dramatic and eye-catching picture, it is not indicative of what you actually encounter outside.

This is what you are more likely to encounter while outside.

In actuality, it is pitch black when you do astrophotography (you generally want to do it when there is little moonlight, no moon, or a new moon). It’s the kind of darkness where when you hear something crunching leaves or twigs in the dark, you are wondering what the heck that thing is.

Frankly, you can’t see much and you need to see where you are going and that is where the headlamp comes in.

When I started astrophotography, I got a headlamp that had four different settings (3 with increasing lumens and one setting that simply flashed the light of the headlamp). The brand of the headlamp was Petzl. I purchased it at REI for about $20.

It is a pretty great headlamp and I take it with me whether I do hiking or astrophotography.

However, after purchasing my Petzl headlamp, I also realized that when using it, it does mess with your eyes—the bright light disrupts your ability to make out the faint stars when you are doing astrophotography.

I later learned that it is much better to get a light source with a red lamp. I ended up purchasing a red headlamp as that would be less harsh on my eyes, yet still allow me to see my surroundings and my camera as well.

I ended up purchasing two Black Diamond headlamps that not only showed white light, but red light as well. As such, depending on what I was doing, I could change the color of the light, i.e. when I was working with my camera, I’d use the red light to minimize the effect on my eyes. When I was packing up my stuff to leave or heading back to the trailhead, I’d use the white light to see my surroundings. I purchased these headlamps at REI as well.

A red lamp allows you to see while minimizing the effects of harsh white light.

If you are not into purchasing additional equipment, I have heard of folks making some DIY solutions for this. If you already have a flashlight or headlamp, I have heard of folks using red cellophane material to cover the light source as a cheaper alternative.

Whatever you decide to do, make sure you have a light source. It’s practical, safe, and will save you loads of frustration when you are in the middle of nowhere taking your pictures.

Happy Star Hunting!

Disclaimer: While I have mentioned specific brands that I use in doing astrophotography, I have not been paid anything to promote these products. These are simply items that I have used and liked while doing astrophotography.

The Basics of Landscape Astrophotography AKA How Do I Do Astrophotography?

I fell off this blog! Work has taken up a great deal of my time.

While that is not an excuse, this might be a good chance for a reset of sorts. I have written about a couple of my own adventures, but let’s just start with the basics of astrophotography.

When many people think about astrophotography, they think about fancy equipment–expensive cameras, complicated tripods, intimidating-looking mechanical mounts. In all honesty, you can start out with very simple equipment.

In fact, as you get better at it, you can stick with a very simple setup.

Really, all you need are the following: a decent camera that can take photos at night, a stable tripod, and a wide angle camera lens. That is really all that you need to get started with some basic landscape astrophotography.

The Camera

I started off with a really old, but reliable camera, a Canon Rebel XS aka Canon 1000D. I think it is about 10 to 11 years old now, but I have found that Canon is a reliable brand. I still take that camera out with me when I go hiking even into the present.

Canon Rebel XS aka Canon 1000D. The first camera I started out with on my astrophotography escapades. Old, but reliable.

I have only used Canon cameras, so I can’t really speak about other brands, but I have heard good things about Nikon and Sony cameras as it relates to astrophotography.

While brands may be a thing subject to the particularities of the user, I personally think the bigger question is the control you are given in order to get the right settings for astrophotography. While a camera may be old, if you can set the right settings, you can play around with those as you learn the ins and outs of astrophotography.

If people were curious, in addition to the Canon Rebel XS, I also own a Canon 5D Mark IV which is what I use for my astrophotography.

The Tripod

I feel this isn’t as daunting to fulfill. You will want a sturdy tripod to handle the weight of both your camera and the lens that it will hold.

Generally speaking, the brand of the tripod will list the weight limit that the tripod can handle. You of course will need to make sure that the camera you pick out and the lens attached to it don’t exceed that limit or else you will up with a camera that falls down and moves around.

Additionally, you will want to get a tripod that can handle the wind blowing. Of course, the pricer you go, the better the material, and the better that it can withstand the elements like wind.

The reason you want a tripod that can handle the wind is because when you are doing astrophotography, you are taking long exposures lasting anywhere between 15-30 seconds. If the camera is shaking during that time, the subjects in your photos, like the stars and the planets, will appear blurry–which is not what we want.

An example of what can happen with the camera when it is not still. The stars appear to trail and the picture looks unfocused.

We want aesthetically pleasing astro photos. To get those photos, we need the tripod to be sturdy so that it minimizes any potential shakes or movement of the camera while it is taking said photos.

The brand of tripod I bought was pretty cheap but it has served me well. I bought a Dolica tripod at a Best Buy about 10 years ago and it is what I am still using to this day. I don’t remember how much I paid for it, but I am sure it was less than $40.

Since that time, I also bought a Manfrotto tripod which I have not tested out yet as I need to buy an additional accessory to make it usable with my camera.

The Lens

In photography, different lenses will accomplish different goals for the person taking the picture. With astrophotography, that rule holds true as well.

I love landscape astrophotography, i.e. taking pictures of the night sky and/or celestial bodies, but also including the landscape–whether that be trees, forests, mountains, hills, etc. in the photo as well.

The focal length of your lengths will dictate the angle of view, how much of the scene is captured in your photo. With a short focal length, you will capture a much larger angle of view, i.e. a bigger portion of the scene. With a large focal length, the camera will capture a small angle of view, i.e. a smaller portion of the scene.

In landscape astrophotography, we want to capture as much landscape and sky as possible, so as you suspected, we want a lens with a short focal length.

Personally, I use the Rokinon 14mm f/2.8 lens which has captured some absolutely great shots on my astrophotography adventures.

Several of the lenses that I use regularly. My Rokinon wide angle lens is shown on the right.

While I have tried finding additional lenses to see if I can capture even more scenes in my photos, I have not looked too hard because I have been very pleased with this lens.

Camera Settings

You have your camera, your tripod, and you lens and now you are ready to try to take your first shot. You are probably asking yourself what settings to try out.

Well, that is really going to depend on where you are, what you are shooting, the amount of light pollution that is out, and what kind of effect you are trying to achieve with your photos.

I know that sounds like a non-answer and is totally not helpful, but it is the truth. However, the setup I start with in order to get sense of what I need to do with my settings is listed below:

Camera: Manual Mode

Photo Quality: Set to RAW quality to get the most details in the photos

ISO: 1600

White Balance: 3200

Exposure: 20 seconds

Auto Focus: Turned off and set to Manual Focus

I will start with these settings, take a couple pictures, and tweak as necessary. I also carry a small notebook and write down the settings I used so that I can refer to them in the future. If something works for you, write it down, so that you can use those same settings the next time you go out! It saves you time and the frustration of trying to remember how you got a picture a certain way.

That is it with the basics! I mean there is more to it, but that is pretty much what I learned first before actually testing my camera out.